AVS Forum banner
  • Everything You Wanted to Know About HDMI Cables. Ep. 7 of the AVSForum Podcast is now live. Click here for details.

Howitzer build

61K views 451 replies 61 participants last post by  PassingInterest  
#1 ·
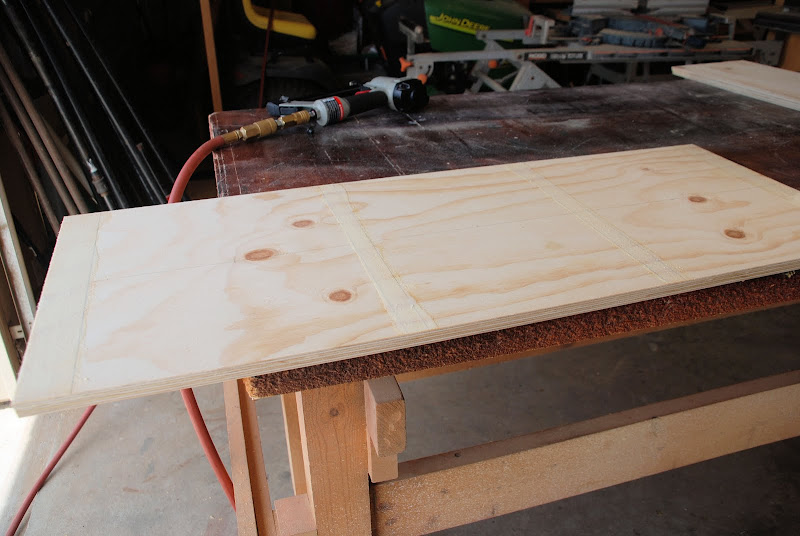
These cannons will be loaded with three 10" NHT 083s (no longer available). The work is progressing slowly, because I can only spend a little time on them here and there.


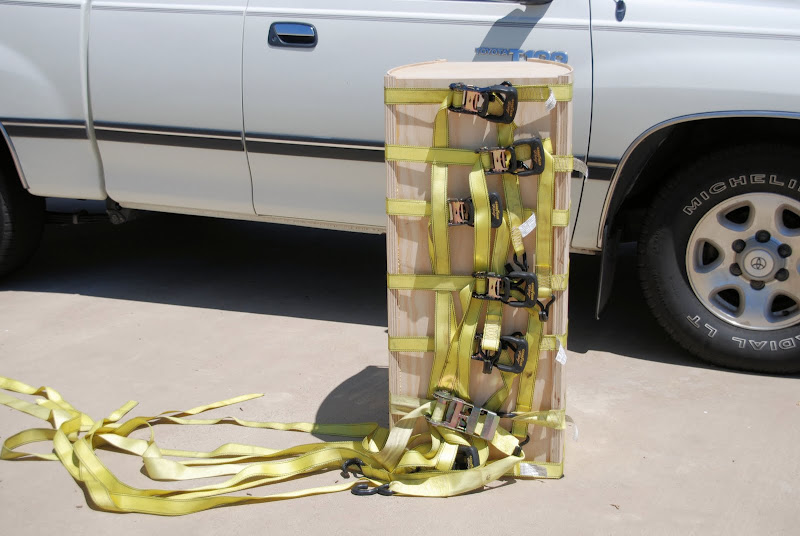
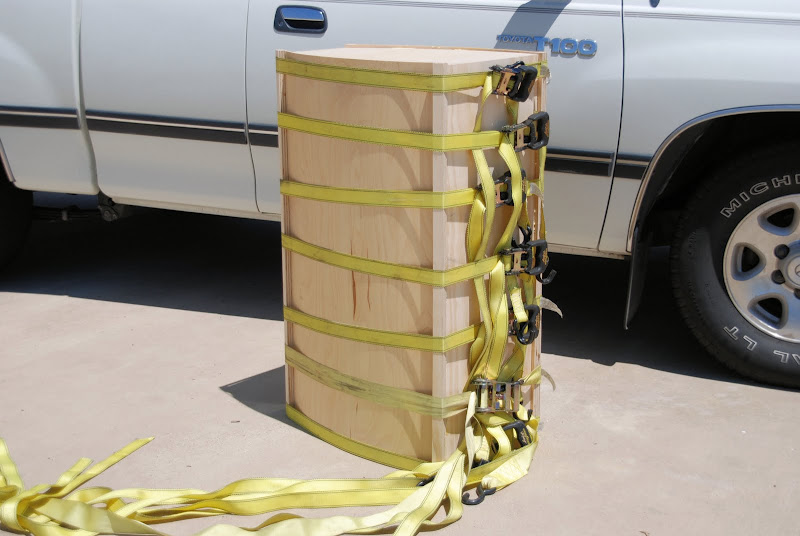
This is my first attempt at building a curved cabinet. I hope to know what the heck I am doing by the time I finish the last of six.


Tying up loose ends--I had previously built some test cabinets, but I was too new at testing to get any meaningful results.


Also, in WinISD, I eventually got around to looking at the driver excursion graphs and saw what some guys tried to warn me about, which is that these drivers appear to benefit from the excursion limiting properties that a smaller cabinet provides.


I intend to slip some graphs in at some point.


I expect this build to take a while, because I can't spare much time for it.

Knowing that, I have gotten off to a good start already, but delayed posting anything until now, so it won't seem quite so drawn out. I hope.


Many thanks to everyone who advised me previously on this build.


The best I am able to tell, it appears that a 1.25 cubic feet per driver cabinet will be a good choice for these drivers. I have no idea how to calculate volume in a curved cabinet, so I just over-sized a rectangular cabinet and hoped that I come reasonably close to a good internal volume after the curving reduces things internally. I'll give dimensions later.


Disclaimer: I am not an expert at anything--just a little bit of a DIYer.


Enjoy the show.
 
#2 ·
There are plenty of curved cabinet builds out there.

I offer nothing new to the seasoned veteran, but hopefully a new DIYer will find something useful in this build.


Let's begin.

Ignore the speaker cutout. This is just some scrap wood.

I knew I wanted a depth of 20", so I set a tape measure at the 20" line and used a ruler to check for a pleasing curve radius and offset. I found a 25" radius to be a good choice, with a 3" offset from the 10" center line. This meant that I can use a circle jig that I made in a previous speaker stand build .

Again, I held my fingers at different positions along the ruler and swung it in an arc and looked for a curve that I liked.

Image


This would look a little less confusing if I had used a large sheet of scrap under the workpiece, but I just used small scrap pieces, so I'll try to explain how I lined things up.


I measured over from the table edge to center the long scrap plywood piece, since I knew that my pivot center is 10" - 3" or 7" from the edge.

Once I had the long plywood piece centered, I held a board along the two table edges to center my workpiece, using small scrap pieces under the workpiece for stability during arc-routing.


Once everything was centered, I shot some short brads into the workpiece to secure it to the long plywood backer. I also secured a small scrap piece with a small pivot hole at the 25" mark, to the same backer.


With everything aligned and secured with brads, I could now move the entire assembly toward the table edge, so I could get some clamps on it.


Again, it would be less confusing if I had used a larger backer.

Image


Here I've secured the circle jig to the router.

Image


Secure the pivot.

Image
 
#6 ·
Knowing how thorough your previous build threads have been, I'll watch with interest since I want to rebuild my Dynamic 4T's with curved walls. I may have a CNC machine at my disposal, but coding is not my strong suit.


Side note: This is the first thread I have subscribed to.
 
#7 ·
I'd like to cut the front and rear pieces with a bevel to match the angle of the curved sides.


First, I need to determine the angle at the point where the curved side ends.


This is the front.

Image


The rear.

Image


The saw's bevel indicator reads "0" when the angle gauge reads "90."

Image


Subtract 90 from 106 and set the bevel to 16 degrees for the front baffle.

Image


Set the bevel to 30 for the rear (120 - 90 = 30).

Image


The rear measures 9 3/8" across.

Set the fence for 9 3/8" with a 30 degree bevel.

Image


Looks like a match. Do the same for the front.

Image
 
#10 ·
very happy to see another one of your excellent build threads going up.
 
#13 ·
I am ready! PI builds are more like artistic expression than a build thread. And you get to pick up some tips!
Image
As always with your builds...tuned in and willing to learn!
 
#18 ·

Quote:
Originally Posted by Erich H /forum/post/20716590


Anyone want to wager that his Toyota T-100 gets thrown into one of the photos just to make me wish I still had mine?
Image
Image


After reading that I immediately scrolled up to inspect each pic again, I thought we may have missed a reflection or a glance at a tire or something. Somehow it doesn't feel quiet right without the T-100 making a cameo.


Just the other day I read someone commenting on how ingenious some people can be and he recalled someone using a truck as a press. I immediately thought, oh yeah, that's Mr. Passinginterest
Image
 
#20 ·
Using screws, secure the template to two blanks and bore some holes.

Tip: Slightly oversize the blanks at the table saw and trim to size at the router.

Image


Remove some waste.

Image


Trim the outside.

Image


Trim the inside.

Image


Image


Image


Use the same template to trim the outside edges of the cabinet tops and bottoms. I chose to use some 1 3/4" particle board that I had on hand.
 
#21 ·
Roundover.

Image


The particle board edges will absorb the glue very quickly and maybe the plywood edges will, too. I applied a coat of TiteBond I to the edges and let them dry before glue-up. I did this for 3 cabinet sets, then later decided to build 2 at a time.


You can apply the glue quickly if you treat all the edges as one large surface.

Image


Then separate them and let the glue dry.

Image
 
#25 ·

Image


Here you can see how nicely things lined up.

Image


The next set of pictures is wrong.

First, I ran into a problem while attempting to curve some thin Luan underlament plywood ($9.99 per 4x8 sheet at Home Depot).

As I tightened the ratcheting tie-down straps, the edges of the Luan cracked and broke, because it is not very flexible at all.

So, I got the idea to fasten wood strips along the edges to distribute the pressure and avoid the cracking.


After I got the strips ready to attach, I remembered that I had a very flexible sheet of some plywood and decided to use that. The 5 x 5 sheet was actually a "pallet protector" on top of a new pallet of Baltic Birch. I asked the guy at the store (McCoy's in the Dallas area) what they did with the protector sheet. He said they threw them away. I asked if I could have it and he gave it to me.


That was months before and I was right about it being very flexible, so I did not need the wood strips. But the summer heat had cooked my brain, so I was not thinking very clearly and I attached the wood strips and they caused a problem, only I didn't realize it yet--not until after I had taken the following set of pictures.


The problem caused by the wood strips was an uneven application of clamping pressure from the straps. It wasn't until I was about to move the box back into the garage after taking pictures that I noticed gaps between the box top and the curved panels.


The solution was to remove the wood strips and re-tighten the straps--the flexible plywood did not need the wood strips. I apologize for the absurdly long-winded explanation.

Image


Image


Image


Image


Image


Again, the wood strips are not needed if your plywood is flexible.

Nothing but some ratcheting straps are all you need to clamp your side panels to your cabinet frame--if the plywood is flexible.